Creating a typical home page
A home page is responsible for signposting new arrivals to key content on the site. They may have arrived deep in the content through a social media link, but if they're interested in what else you have to offer, they'll generally want to see the home page. That means it's super important to get right.
Most news websites have long home pages. Take a look at The Guardian and you can see that if printed out, it would need a very long roll of paper! Why? Because people scroll - with wheel mice and flicks of the screen they can scan your content super fast. To work well, headlines need to be clear and short and images should be engaging. Don't worry too much about what is above and below the virtual 'fold' but do worry that the very first pieces will set the expected tone and either encourage or discourage further scrolling.
With that given, let's lay out a home page. By the end of this article you should have a good understanding of how to lay out a home page in Standfirst for Web.
First, head to Pages, Add New in the menu.
This brings up a nice and empty page, which you're going to give the title of Home Page (it doesn't have to be, of course - whatever works for you is fine) and select the template of Landing Page.

Once done, you must save the Page Draft (top right) and this will load up the Page Builder tools:
As you can see, the page builder starts empty, and the page you've created, will look pretty sparse at this stage if you press preview in the top right. At this stage you may wish to set a featured image for the home page. This won't be used for most templates, but it's often picked up by social media. Make it a nice splash for that purpose and you've made shares of your main site look good!
Carrying on, let's press that Add Block button, and you'll see quite a list:
| CTA | Call To Action - a strongly styled block designed to encourage a viewer to follow through to something such as buying something, or learning more about something. |
| Features List and Image | A list of content with associated content. |
| Features Boxes | For that big feature item. |
| Features List | Features without images. |
| Image and Text | Just an image and text that you can content manage. Maybe selling a feature of something you're selling. |
| Logotypes | A series of logos - often used to show credentials such as which customers your organisation has. |
| Pricing Boxes | Got various offerings? List your prices and your features with this. |
| Selected Cards List | You can select specific content to appear on the page from around the website. |
| Automatic Cards List | You can automatically select content from around the website based on a set of rules. |
| Team Members | Got a team? Show them off! |
| Text Block | A block of text. Hard to talk this one up, really. |
| Video | A video block - useful for product demonstrations. |
Don't feel too overwhelmed! We actually recommend having a play. You can't break your website, and we always give every customer a staging site to experiment on. We're going to go through the Blocks below, but not in order. Instead, I'm going to show how a page could be built from each Block type and how that results in an attractive and well formed page.
Selected Cards List
Let's assume that the top most post on the home page is something you wish to choose directly as a featured article, and that this is always under editorial control. The best for that purpose then is the Selected Cards List. Drop it in, and you'll see you can choose a colour scheme (defined by your site's design) and have a number of fields to work with. In this case, we're keeping it simple. Select Light scheme, Default Cards, 1 Column, no background image, and a single article. The article selection allows you to search for a post. Start typing and options will quickly come up:

Choose your post, and select.
On your home page, you should now see something like this:

Automatic Cards List
Next, we want a few posts showing. We're going to call this "Featured posts" and we're only going to select from a Category called Features.

As you can see, this is a more sophisticated Block. Again, you can choose your colour scheme (this helps give visual variety to the page), give a heading, a link for that heading if desired, choose your style, how many items to pull in, and the number of columns.
In the above example we've chosen to pull content from only Features, and from only standard Post Types. On most installations you will only have one Post Type, called Posts, but you may have a custom Post Type for, say, Book Reviews where content is structured a bit differently and you use affiliate links.
We won't run through every possible feature here, but instead recommend you experiment with the controls. If you're feeling especially brave, delve into the Advanced options where you can experiment with order, offsets, and add certain types of logic.
On our example, we're going to use this twice, with a Read More at the bottom, pulling from slightly different rules.
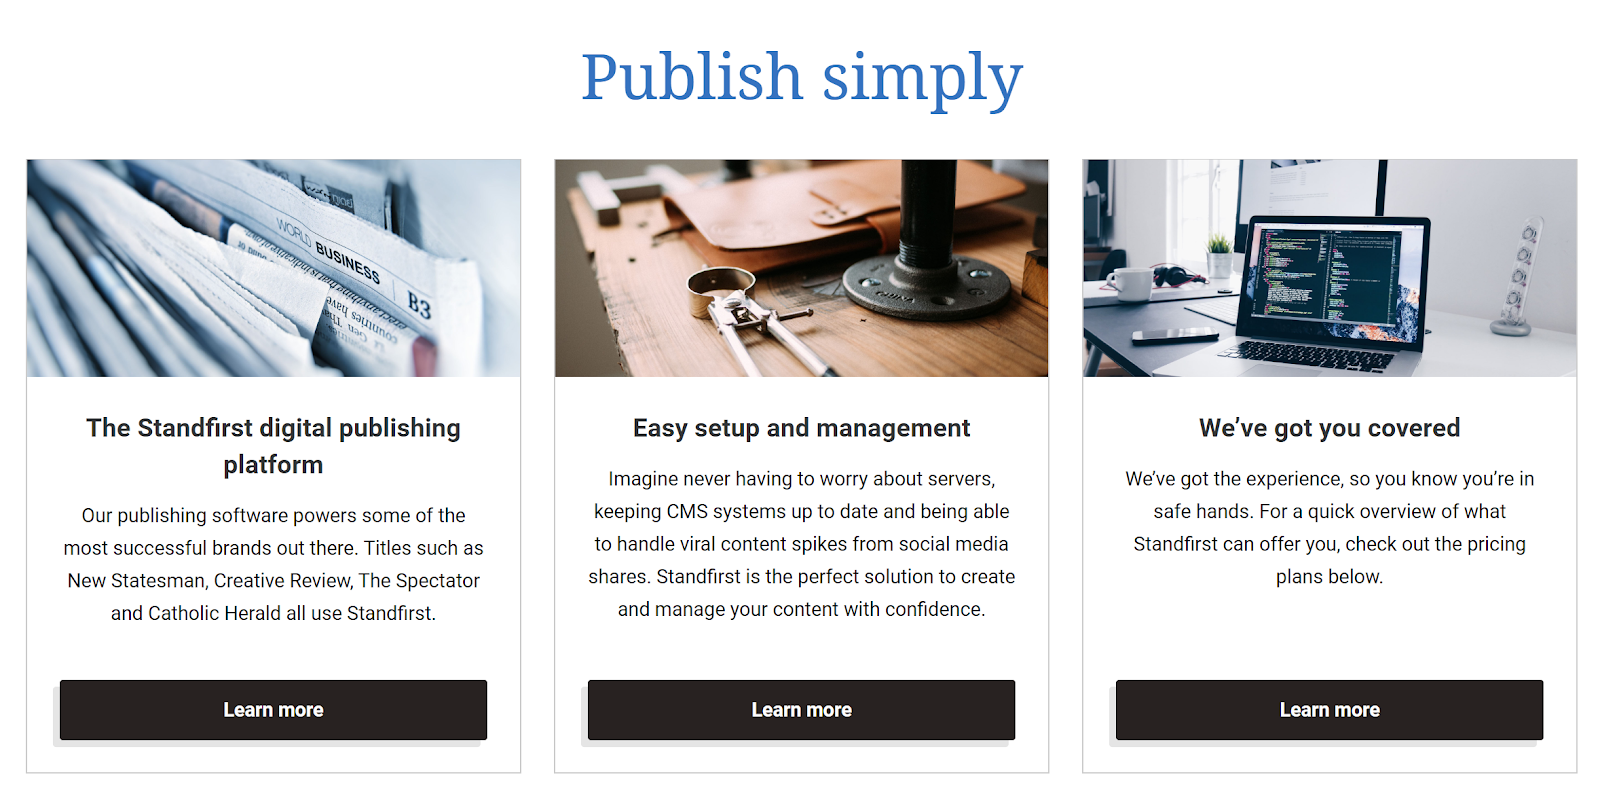
Features Boxes
When you need to sell some key features, or get people digging into more explanatory content, you may wish to set up some boxes with a simple button to send people through to other content.
The content for these boxes is entirely managed within the tool, rather than pulling content from other parts of the site.

Once you've created these blocks, you may want buttons to link out - just fill in the Button Text and Link fields to direct visitors to the appropriate pages and you'll have a block on the front that's like this:
Call to Action
It's always important to have a strong way of directing people to a key product or offering.

The Call to Action block is one of the simpler ones to administer:
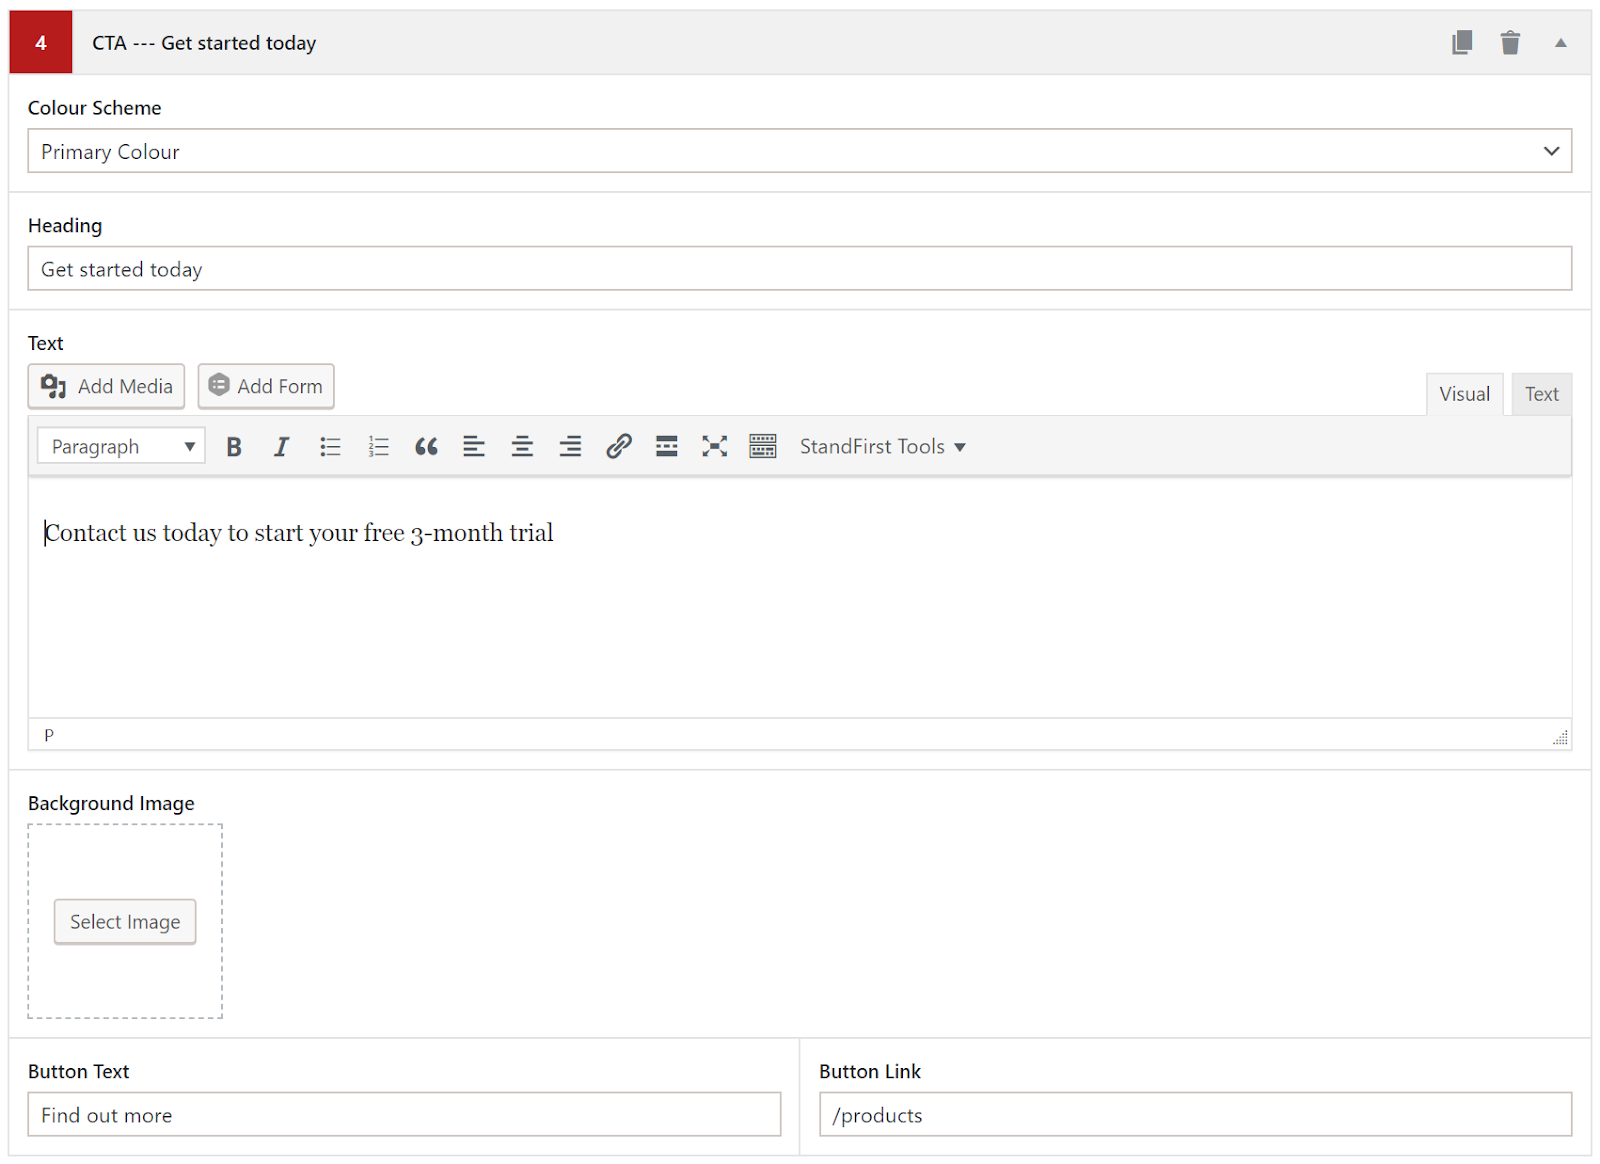
As you can see, there are a number of options but it's largely straightforward.
Rearranging your blocks
Once you have your Blocks in place, you can rearrange them with a simple drag and drop.

The end result
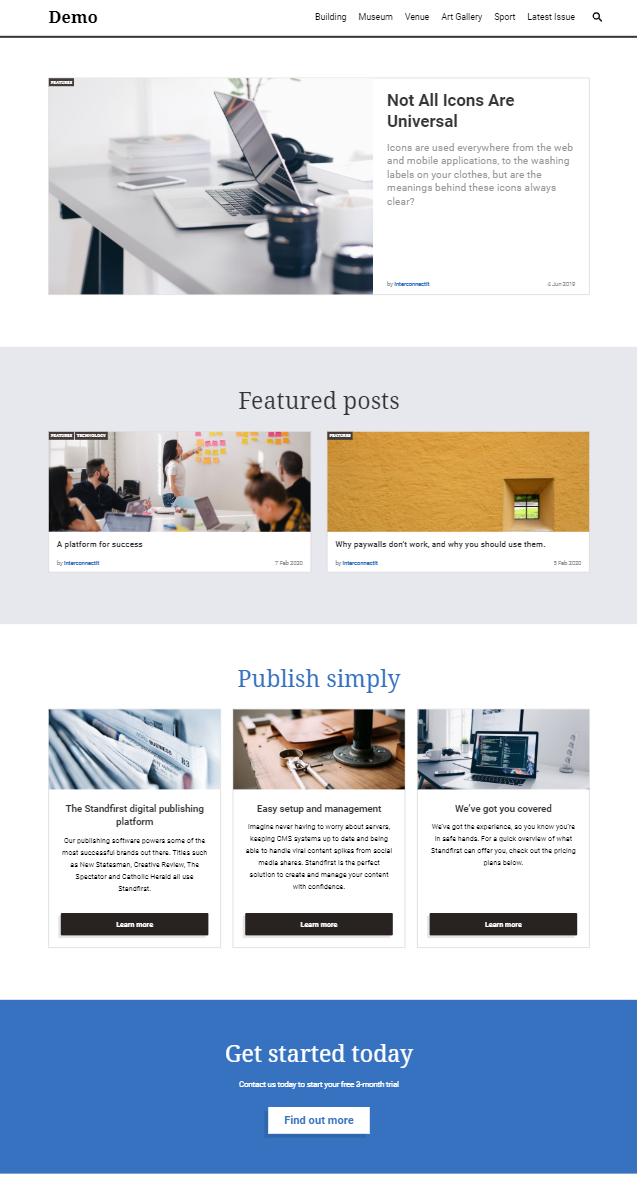
Doesn't it look lovely? Of course, the screenshot actually keeps going, but you get the idea. Want to move an element to the top? Open up the page, drag the box to its new position, done!
Managing your user profile Creating Your Flash Briefings Understanding the organisational structure support by Standfirst Adding an article Advanced Menu